The rule of thirds is the most famous composition technique photographers use daily. But have you ever wondered why?
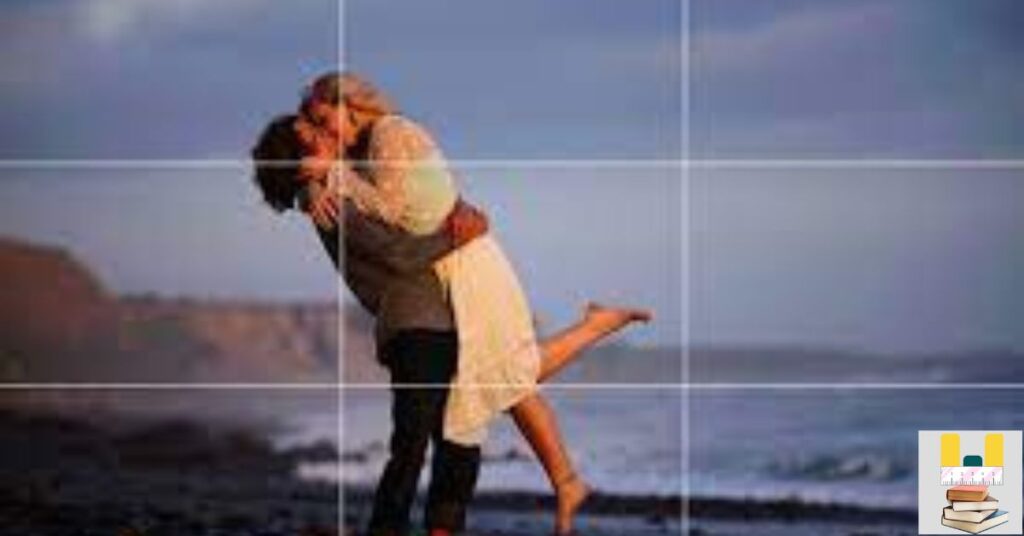
You can create a dynamic and visually appealing image by dividing your frame into thirds and placing your subject at one of the intersecting points.
In this article, you’ll take an in-depth look at the rule of thirds in photography, how to apply the rule of thirds to your images, some rule of thirds examples, and more!
Go for it!
Rule Of Thirds for Beginners
The rule of thirds is a fundamental photography and design guideline that includes splitting a picture horizontally and vertically into thirds, resulting in a grid of nine equal sections.
The intersections of the lines are the most visually attractive places to place your primary subject or subjects of interest.
This approach helps you in creating visually appealing and balanced compositions.
Example Of Use
Most cameras and editing programs have a grid representing the lines of the rule of thirds.
To familiarize yourself with it, you can activate it until you get used to this type of composition.
The rule of thirds can be applied to any photography, but it is usually most common to see it in portraits, product, or landscape photography, among others.
Rule Of Thirds Grid
The rule of thirds grid is a way to make balanced pictures look good. It is used in photography, film, and design.
It splits the image into a 3×3 grid with two horizontal and two vertical lines and suggests putting essential things along the grid lines or at their intersections.
In-Camera Thirds Ruler Grid
To begin implementing the rule of thirds, do this. The third grid’s rule must be able to be previewed.
This feature, which aids in framing the shot, is standard on all modern cameras. It may not be enabled by default. Therefore, you may need to enable it from the settings menu.
Please find out how to turn it on by consulting the manual that comes with your camera.
The Rule of Thirds: How Does It Work?
Points slightly beyond the image’s center are where the human eye naturally tends to focus. On a grid using the Rule of Thirds, these spots are where they cross.
For instance, persons who read text from left to right also read concepts in these cultures. Because of this, the bottom right region of a picture is the most eye-catching, while the top left is more likely to be ignored.
How do you explain the rule of thirds?
Points slightly beyond the image’s center are where the human eye naturally tends to focus. On a grid using the Rule of Thirds, these spots are where they cross.
For instance, persons who read text from left to right also read concepts in these cultures. Because of this, the bottom right region of a picture is the most eye-catching, while the top left is more likely to be ignored.
How to Follow the Rule of Thirds Photography Practice
- Take many pictures of the same object on various third lines.
- Then, take a picture of the object in the exact middle of the frame.
- Take a lot of pictures. Examine the pictures afterward and choose your favorite ones.
- Then show them to a trusted friend or mentor in photography and ask them which ones they like most.
Why is the rule of thirds used by photographers?
Why is the rule of thirds used by photographers? The same tunings and tonal structures are used by Western musicians for the same reason: because they are effective.
In addition, people are more receptive to photographs when they are presented with symmetry, balance, and standard forms because these things appeal to humans.
It is not like or dislike. However, repulsive or terrifying photographs must be carefully arranged to get the desired impact.
In other words, we’re not attempting to change how the brain is wired; we’re just accepting it.
Application of the rule of thirds
Photographing people, objects, and anything else that looks into the frame and invites the spectator in rather than pointing it out may be beneficial.
However, this is a general rule, and many effective pictures accomplish the reverse. Place the eyes on the top line when drawing portraits.
The idea of negative space and the rule of thirds often go together.
For instance, it’s usually a good idea to position the subject on a Rule of Thirds intersection so that they may gaze into the open side of the frame if you’re taking a picture of someone looking either left or right.
Due to the “breathing room” and negative space provided, the observer can easily follow the subject’s gaze in the photograph.
Beginners often center the horizon in the center of the frame while shooting landscapes or other outside sceneries, which causes the picture to seem halved and lifeless since nothing is highlighted.
Try placing the horizon line on the top or bottom “third” line as an alternative.
When planning your composition, you must decide whether the top or bottom of the scene is more crucial. The horizon line is positioned lower in the frame if it’s at the top.
If the horizon is lower in the picture, it will be given a higher rating. Test out one of each and decide which you prefer.
If there isn’t a distinct horizon, search for a top line or anything that suggests one, then use it to guide you to a rule of thirds with a prominent element like a rock, tree, mountain peak, or even a sharp point.
Setting your topic on the rule of thirds with precise accuracy doesn’t need you to be a zealot. Just get to the general vicinity. Continuously keep in mind that it is just a suggestion.
Does the rule of thirds apply to portraits?
The eye line is considered while using the rule of thirds in portrait photography.
The eye line is typically positioned in the top third line of the frame by experienced portrait shooters. In addition to providing enough headroom, this slightly off-centers the model’s face to increase intrigue.
Because you have more time to position your subject, locate the proper composition, and obtain the perfect image in portrait photography than in street photography, it’s a great chance to practice applying the Rule of Triplets.
The use of the Rule of Three – quarters in Design Portrait Photography
To create fascinating portraits, use the Rule of Thirds because no human face is symmetrical.
Place one of the top two junction points on your subject’s right or left eye.
Your subject will seem more natural and at ease if their shoulders are aligned with the lower-third grid line.
You may draw the spectator into the picture by carefully leaning your subject toward the other vacant quadrants in the grid.
Think about taking a horizontal photo for printing.
The situation requires constant monitoring. The midsection of the picture does not include any critical information (Yet another reason to use the Rule of Thirds to construct your photographs.)
What is the Golden Triangle in photography?
The Golden Triangle is a photographic compositional guideline that employs diagonal lines to create a triangle form inside the frame.
It is akin to the Rule of Thirds and may aid in creating a balanced and aesthetically appealing picture.
The Golden Triangle guideline will be examined in more detail in this article, along with suggestions for applying it to photography.
When you use the Golden Triangle principle in your photography, you’re laying the groundwork for a well-done job.
Traditionally arranging images creates symmetry, clarity, and even harmony. You may coordinate your subject and other objects in the frame using this visual compositional guideline.
But your topic is separate from a triangular form! Instead, you’re only lining them up along four imposed fictitious guidelines that create triangles over your captured picture.
This may assist you in aligning the composition proportionally inside the frame, much like the rule of thirds.
Where does the Golden Triangle principle originate?
The Golden Triangle technique can be found in photography and online design to direct the viewer’s attention. Its origins are unknown.
However, it is said to have been inspired by the rule of thirds, which goes back to the 18th century.
It started as a technique for aligning subject components in the frame to convey a feeling of symmetry and deliberate composition while producing paintings.
For example, you may make four triangles within the frame by diagonally cutting a skeleton in half (from one edge to the next), then cut those two portions perpendicular to your original line, with each new line slightly angled toward the corresponding side.
The center of those intersections would then serve as the focal point for your subject(s).
This composition approach aids inappropriately positioning your issue (s) inside the frame to improve composition and balance the whole picture, much like the rule of thirds.
How to use the Golden Triangle principle while taking photos
To use the Golden Triangle principle:
- Start by identifying the most vital element in the scene and placing it at the intersection point.
- Use lines or shapes to create the triangles around it.
- Experiment with different angles and shapes to create a dynamic composition that draws the viewer’s eye.
What is the golden ratio in photography?
In photography, the golden ratio is a way to arrange the subject so that it is about 1.618 times farther from one edge of the picture than the other. This creates a nice balance.
The golden ratio is impressive because it can be seen in everything from the human body to well-known works of art and everything in between.
Artists began employing this mathematics as the foundation for compositions in the 1500s, although it existed independently of humanity long before recorded history.
Due to its capacity to produce harmony and beauty, Renaissance painters called it the “golden ratio” or “divine proportion.”
How to Enhance Your Photography Through the Use of Golden Ratio
Since ancient times, the Golden Ratio has been a potent compositional tool. This design approach is based on the 1 to 1.618 ratio.
The Golden Ratio sometimes referred to as “the ideal number,” may help you create photos with compelling compositions that will draw visitors in.
The rationale is straightforward: the Golden Ratio enables a perfectly balanced composition from the spectator’s viewpoint, producing a most aesthetically beautiful shot.
Additionally, the Golden Ratio offers the flat, harmonious picture we naturally love to gaze at.
The Golden Ratio may be used as a design element in photography to create striking compositions naturally.
This will attract readers to your shot and guarantee attention right away. The Golden Ratio will also enable the visitor to navigate your image in a circular pattern.